Showing posts with label image transfer. Show all posts

Friday, May 25, 2012

Empty Spaces (in my head?)

Jane Davila -
Usually I have more ideas than I know what to do with, more ideas than I have time to implement. Lately though (does the last 7 months count as lately??) the urge or drive to create has dropped way off. The ideas are still there, but the impetus is lost. I found myself in a creative slump, feeling insufficient creative energy to make anything, doubting every process and technique. I know most of us find ourselves there at one or another point in our artistic journeys. Knowing this doesn't necessarily shorten the torture, though it is consoling to know one is not alone.

One of the obstacles I set up for myself is that I knew I wanted my piece for this theme to be the second in a series that I've been wanting to pursue for a long time. In fact I had made a few false starts on a second piece any number of times in the last couple of years. Initially I had created a piece for a mixed-media exhibit a few years ago and, when it was done,  made a mental note that it was a direction I definitely wanted to follow and develop into a series. Subsequent attempts weren't successful from either a compositional or technical standpoint. I started to think that the first piece I made was destined to be a "one-off". I decided to give it one more go for this theme. Nothing like adding a little pressure to your stress!

Carmina Figurata -  the original piece in this series


It can be helpful, when encountering a creative block, to go back to a place where you did create something you were happy with and make another in that series. Because I had already attempted this avenue with this series and felt that the results were less than successful, I knew that this strategy wouldn't be as useful as it could be. However! Sometimes forcing and pushing through and around that block is possible with persistence.

All of this is a long way of saying that my piece is complete. I pulled fabric and paper for a color palette to work with (oddly, none of these made it into the final piece).


I returned to my beetles as subjects, gave them a sense of movement by placing in and out of the frame and in different directions, and aged or distressed them with ink and paint. I played with the "empty spaces" or negative space between them and also kept them as stark silhouettes where the positive and negative spaces of their bodies spoke to the theme as well.


Instead of the painted canvas that I used in the first piece, I choose an aged linen on a thick stabilizer as a substrate this time. I machine quilted arced lines into it and then added hand embroidery with a variety of coarse linen threads.


The beetles themselves are sewn onto a piece of Arches watercolor paper that has been heavily embossed with a variety of textures found in my studio. I collaged other embossed papers onto the watercolor paper as well.


The final piece invites the viewer to step closer to see all of the bespoke details. Now I am looking forward to creating more pieces in this series and hope that I have seen the back of this particular creative block!

Artius Vacuus


Wednesday, April 18, 2012

Part Two

Carol here again.
Continuing the tale of my "Empty Spaces" piece.

I want to be completely honest here and say that this has not be an easy or free flowing piece of work.
Life interferes, my mood can change what is happening in my work and I'm not used to following a set theme when I create.
Having said all of that, I will say that my own misunderstanding of the deadline created some angst as well.
I thought that I had a month less than what I really had to complete the artwork.
It was great finishing it early but that extra month would have been nice!


I continued to build up the backgrounds with more transfers.
Using cheap foam stamps, I added a layer of text on top of this.

I used a fluid acrylic paint with mica pieces in it to give a little bit of shimmer.

I really liked the look of the larger letters but wanted them to fade into the background more.
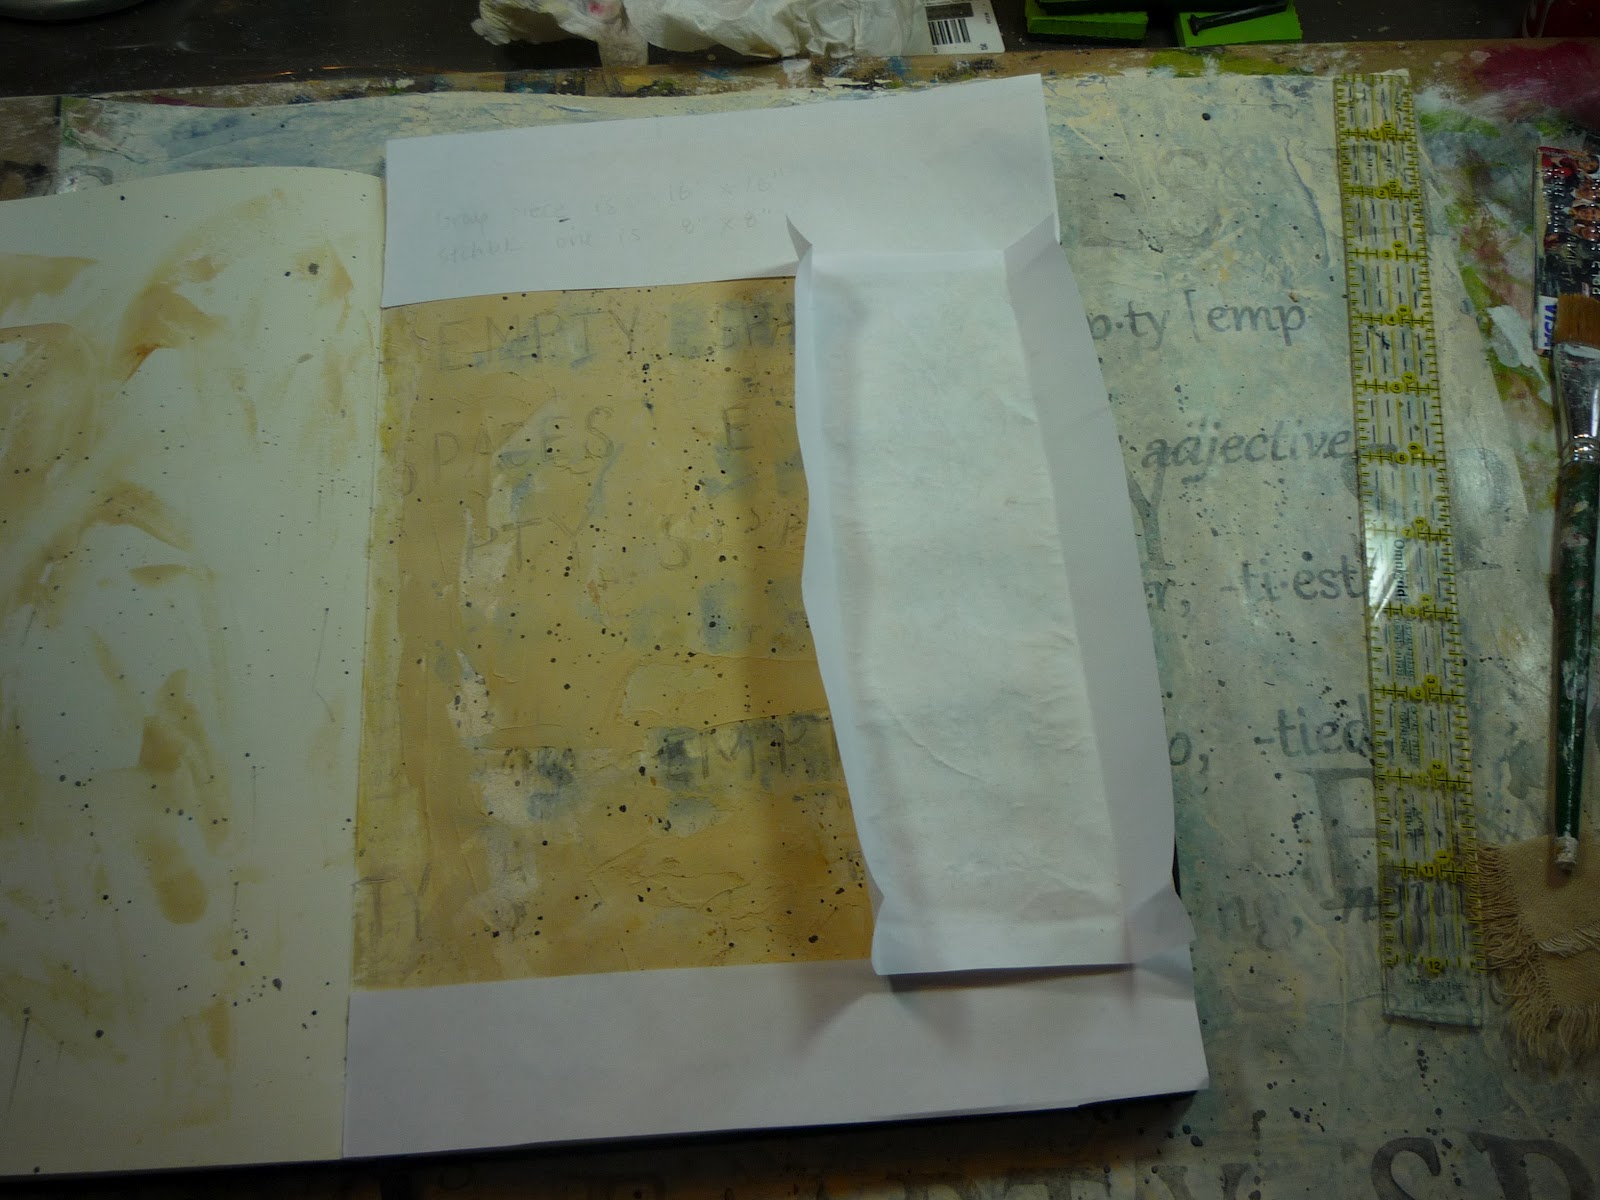
I wanted to introduce more texture at this point so I pulled out the sketchbook that I had been working in.
Here is one of the pages that I experimented on.


I liked that so I applied an irregular layer of modeling paste (or molding paste depending on the manufacturer) with a large palette knife.
You can see that I skipped areas - just here and there to add some texture.
I did a couple of layers of it - I added paint to the paste before I applied it to one canvas, the other one I painted  over the paste afterwards.

Notice how I have left an area around the outside of the canvas blank.
This area will be on the back of the piece after it is completed. 
I think that the paint color was raw sienna. The addition of the white molding paste did act to subdue the paint color somewhat but I liked it.
I started really getting into what was going on with the canvas piece at this point and just kept going with it.

I loaded a small brush with a lighter color and let my crazy side (what? you say...so you thought every side of me was crazy!) take over.
I spattered  small amounts of the (titan buff) paint as well as a little bit of black.


If you look closely you can see the lines from a transfer that I did
of one of my mom's journal pages.

I really liked the piece and was at the point that I feared screwing it up by doing anything else...but knew that it needed something else.
This was when I returned to the sketchbook to work out my plan.

I revisited my writings when I first began working on the theme -
"I began to think of other empty spaces.  Spaces that existed for another purpose.
Like in the garden. You dig a hole (a space that is now empty) to drop a seed into it.
Or maybe in the forest. A tree falls to the ground, rots and eventually leaves an empty space there. Yet, in that space, mushrooms begin to grow. Small plants sprout up.
The space is empty yet the death of one thing has provided a fertile space for another.

Life finds a way to fill that empty space."


With that fresh in my mind, I began looking at the canvas as the empty space that was acting as fodder for my emotions, a space holder if you will...and allowing it to symbolically be a fertile ground for the growth of something else. My negative emotions were decaying, they were becoming fertilizer to this ground.
I felt that I needed to see new growth in this space.


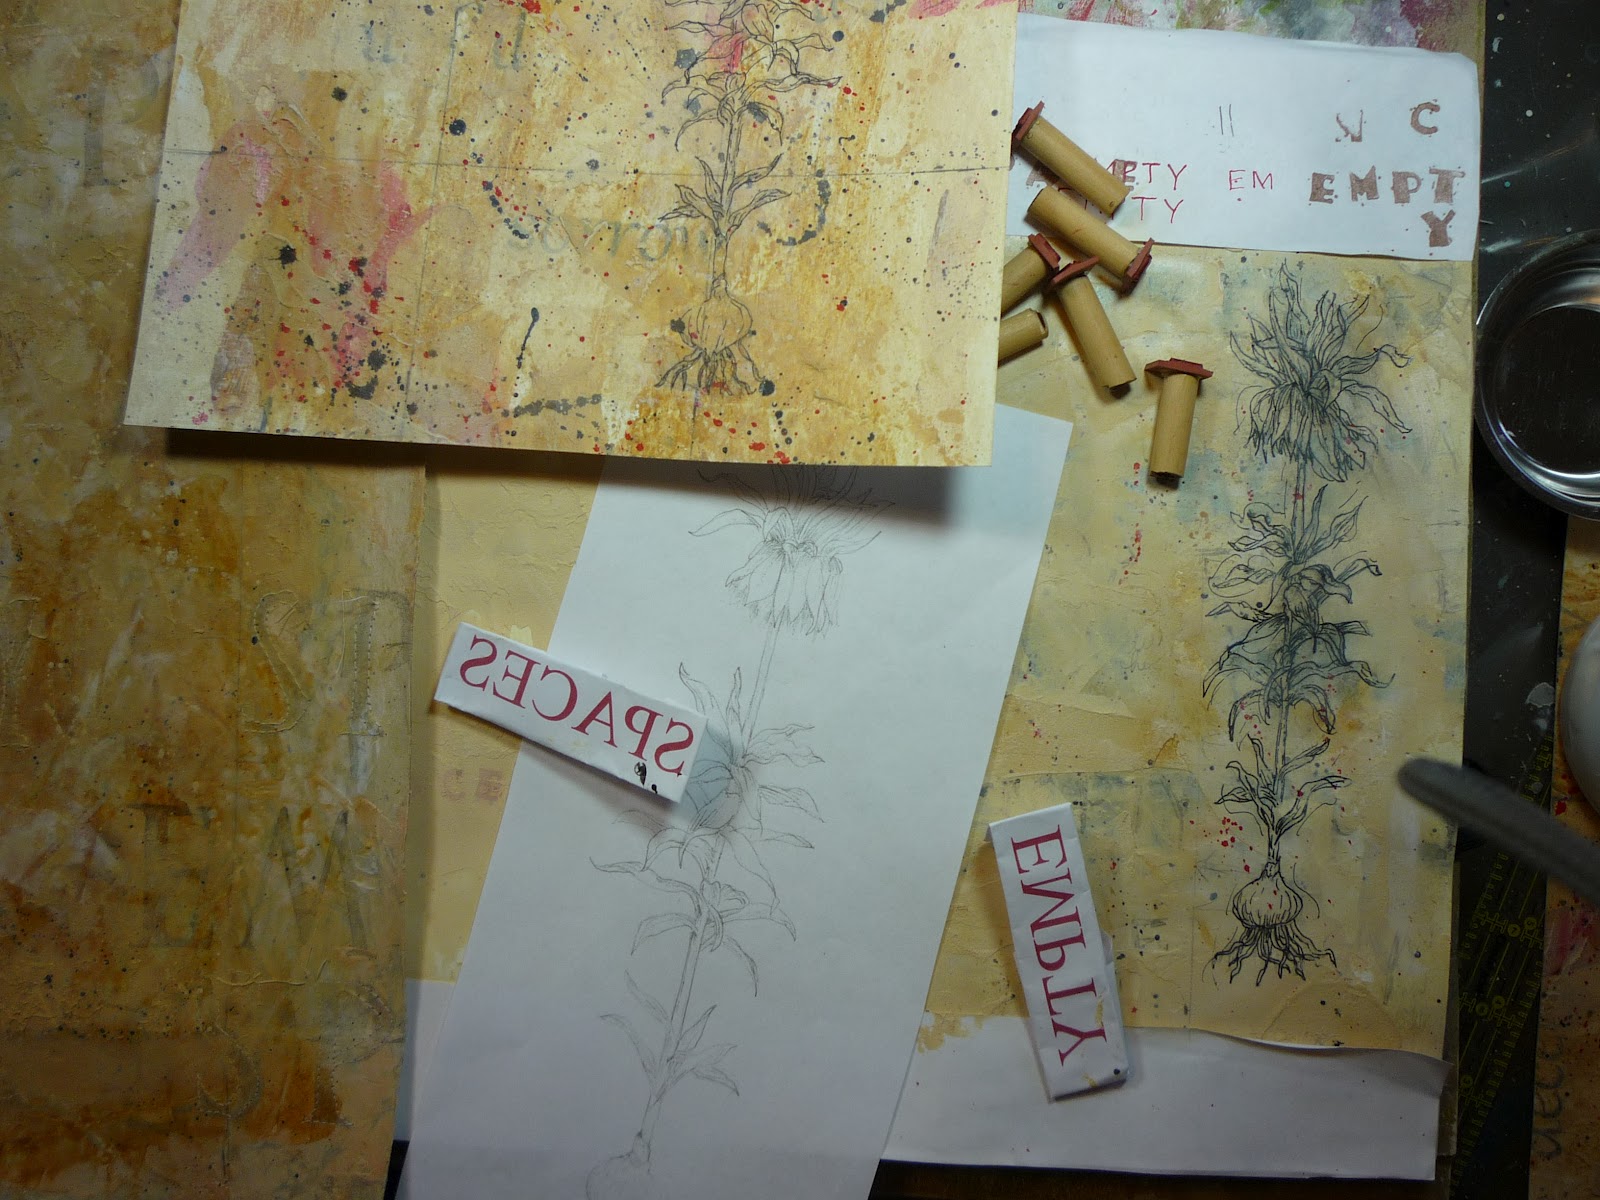
I had a drawing that I had done of a flower with it's roots growing down, strong and bold. I wanted to try it out but not on the canvas that I liked.
I created a mock piece in my sketchbook, scanned the drawing, printed it out and used it as a transfer on the page.
The drawing was rather detailed and I didn't want to take the time to draw it again but needed a fair representation of it. A transfer was the quickest way to do this.


You can see the second piece that I started under the sketchbook.
I had done a couple of paint washes over the surface trying out different colors.


I often, quite often actually, get into working things in my sketchbook so much that I go overboard with the details of it all...
and that is exactly what happened here. 
I was having so much fun drawing, stamping and painting that I totally allowed it to take me away from working on the actual piece of artwork!


The sketchbook was becoming the artwork.
I had to step away from it.


It was a good thing that I did this work in my sketchbook because I realized that the full drawing of the plant was too much - it was too small, too detailed for that size of canvas.
I decided to use a portion of the drawing but modify the size a bit.
Using the scan from the original drawing, I enlarged it so that about a third of it would fit on the 16 inch square canvas.

I cut the flower out to get a better idea about the size.


I liked the size as it (roughly) divided the size of the piece into thirds.

There were two other things that I had in mind for this piece:
adding machine stitching
adding a touch of red (for a tan, black and red color scheme).

So it was back to the samples for me.

Here is a practice stitching (complete with one backwards letter!).


Long story even longer, I loved the addition of the stitching so much that I stitched several of the stamped text blocks with a light colored thread. This will reward the viewer that takes a closer look at the piece.
This brings us to the last phase of the creation of this piece of artwork.

I'll give my cohorts a chance to talk before I finish up with mine.

I hope that you all are living your life as creatively as you can.
As women, who tend to give and give and give, we need the outlet that creativity can offer us.
We need to be able to give some energy over to what is fun, what is joyful to us.
And that is what creating art is to me.
It sustains me.
It lets me put all of the stress of the day on the shelf for a bit and allow my passion to take over.

Are you honoring your creativity?

Monday, February 13, 2012

Humble Beginnings

Carol here.

In my last post, I talked about gathering the collage items that I felt I might use in the "Empty Spaces" group theme.
I was approaching the theme from this viewpoint or perspective -
I began to think about the theme as that kind of empty space – the space left after the “usual or appropriate contents” were emptied.
With this seed of an idea germinating  in my mind, I began to think of other empty spaces.  Spaces that existed for another purpose.
Like in the garden. You dig a hole (a space that is now empty) to drop a seed into it.
Or maybe in the forest. A tree falls to the ground, rots and eventually leaves an empty space there. Yet, in that space, mushrooms begin to grow. Small plants sprout up.
The space is empty yet the death of one thing has provided a fertile space for another.

Life finds a way to fill that empty space.

After thinking about the theme with those things in mind, I returned to the original thought – the empty spaces that loss can leave us with.
It doesn't have to be death, it could be the loss of respect, loss of love, loss of trust.

I spent a few days hiking in the forest right around this time. I had many hours of solitude to work through this thought process.
I wrote pages of notes while I was out there. Sitting there, surrounded by nature, hearing the rushing water of the nearby river helped to clarify my thoughts.

 I only had a vague sense of what I wanted to do, I began by randomly moving papers around on my background.

But first - I want to share a piece of information about the way that I work. One that could help you as well.

When I first begin a new piece, I pull out enough raw material to make TWO pieces. I practice my ideas and layout on one and use the other as the "real" piece.
This gives me SO much freedom to try new things, to experiment with all those "what if's" that I listen to and allows me to screw up all I want while saving one piece to proceed with (most of the time ).
Oftentimes, my practice piece turns out to be my favorite one!
You should definitely try operating this way (especially on smaller pieces) if you are terrified to try new things or just want to experiment with listening to your intuition (instead of doing things the same old way or the "safe" way).

 I decided on the finished size (16 inches x 16 inches) and added about three to four inches to this measurement so I'd have enough room to place the canvas onto stretcher bars when it was completed.

I used two different substrates since I wanted to experiment with the Multi-Purpose Cloth. The other one was a piece of canvas (medium weight) that had a light to medium coat of gesso applied to it.

I used Golden's Soft Gel and Matte Medium as my adhesive and sealer.

The first approach was to collage a bunch of different things onto the background- everything from handwritten notes to tissue paper.

And keep in mind that this layer is NOT about beauty. It's about embedding my thoughts, the physical evidence of those empty spaces left from personal loss or grief and about adding items that will deliver some texture in a subsequent layer.

Here's a look at how they started.


 The photo above is of the base with  Multi-Purpose Cloth (MPC). It's much thicker than the canvas.

I lived with the background for a day or two before proceeding.

That's one thing about working intuitively - you have to spend time quietly listening to your inner voice. There are times that my voice screams at me (lol) to do things but other times she has me quietly looking and listening for what's next.

One thing was pretty clear to me though - the abundance of color on the MPC background had to go.

I felt any piece that was approaching the topic of "empty spaces" as a loss, as a  space left after the “usual or appropriate contents” were emptied didn't need to be colorful...I felt that it needed to be very quiet, very soft and a noticeable lack of color.
It needed to look the same way that space felt to me.

I decided to add a wash of acrylic paint over it.
I used a watered down fluid acrylic paint and spread it across the entire piece.

paint+water=wash
I had several deadlines looming that were playing through my head. I believe that this fact combined with the addition of some  physical pain that I was going through caused me to rush the process.
I tried to push the creation of this piece, which resulted in - you guessed it- a lot of (what I considered) mistakes or poor decisions.

That's one good thing about using acrylic paint and image transfer. You can cover things up or bury them so deeply into the background that no one will know what you did!

Well, except now you will know what I did...but it's all about learning and growing, right?

The wash helped to knock back the brightness but it still wasn't what I wanted.
I used an old credit card (my favorite paint mover) and scraped some watered down white paint across the surface.
I loved the way that the texture from the addition of the tissue paper and napkins took the paint!


I began working on the canvas right about this time. The time spent playing on the first piece taught me that I didn't want bold, loud colors for this canvas.
I was starting out with an empty space of canvas with a light coat of gesso on it

raw canvas on the left, canvas with gesso on the right

I knew that I wanted to embed the definitions of certain words into the background. I wanted them to be partially hidden, elusive to the viewer and fairly transparent at this point.
I decided to use Matte Medium to transfer since it would be kinda grungy, transparent and I already had several things printed out.

I had forgotten to "flip" (or "mirror") the text before printing it. This would result in the text being backwards if I used it for transfer. I decided to go ahead and use it anyway since most of it would be covered up.

I cut out the text that I wanted to transfer, leaving a narrow strip around the edge so I would have something to grasp when I removed the paper. I also fold one corner back to make it even easier to begin that process of pulling the paper up.

Spread an even layer of matte medium on your substrate, not to thick but not too thin either. I would practice this a few times if you're just learning how before you do it on a "valued" piece of artwork. It certainly isn't a perfect transfer but I love the dreamy/airy look of it.
Burnish the area that you want transferred, making sure there is solid contact between the paper to be transferred and the substrate (canvas).
Since I used an ink jet printer, I didn't wait for the medium to dry. After a couple of minutes, I pulled back one corner of the paper to see if the ink was transferring.
If it is you can pull the paper up (as much as you can), being careful to stop if you notice that you're pulling the entire image up.
I wet my fingertip and rub the area to remove the rest of the paper from the transfer. It can be a pain if you have a large area to work with but it sure is a lot of fun to see your image appear!

I love the areas of overlapping transfers


 In the photo above, you can see that I have several images that are overlapping each other. That's one of the things that I like about this type of transfer, you can layer your images and they still remain transparent.

I'll pick up from here on my next post.